Introduction
Lets take a look how to integrate Custom domain and Sub-domain with Firebase hosting. We will be integrating domain purchased form GoDaddy.
Things needed
- Project hosted at Firebase hosting
- GoDaddy Account access
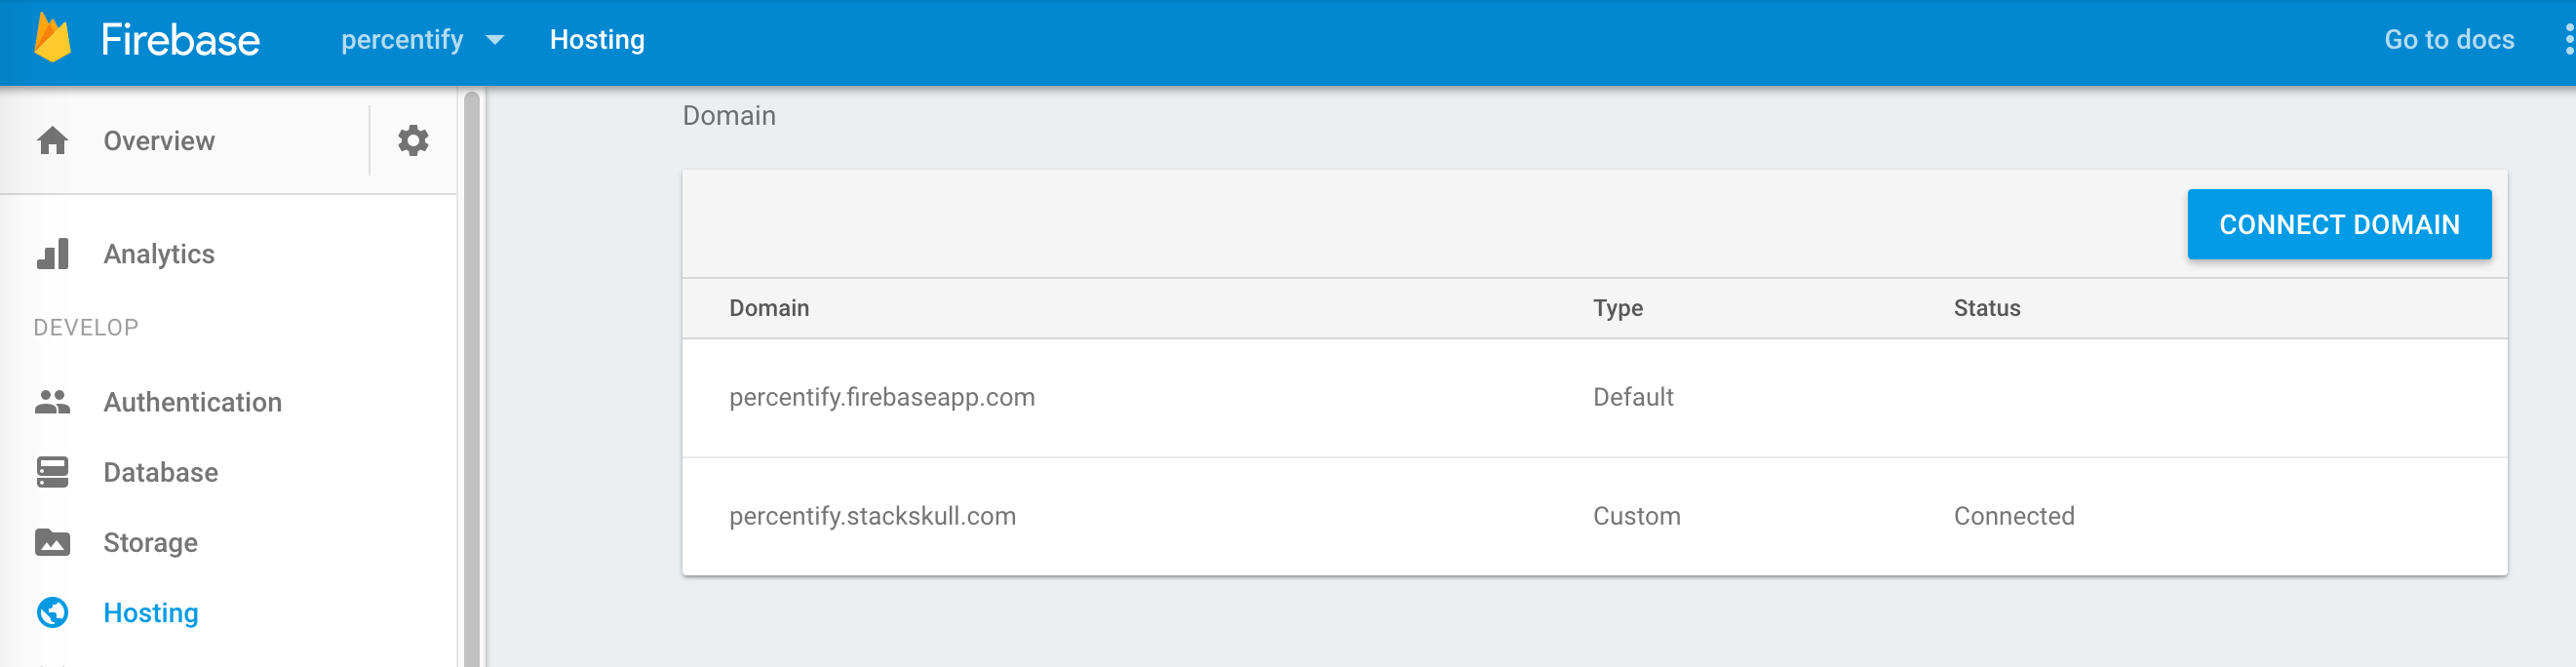
Firebase console
- Go to firebase console, select your project
- Click on Hosting from left panel and then click “CONNECT DOMAIN” button
- You will see an “Add domain” popup. Type in your custom domain name e.g. mycustomdomain.com and click “CONTINUE”
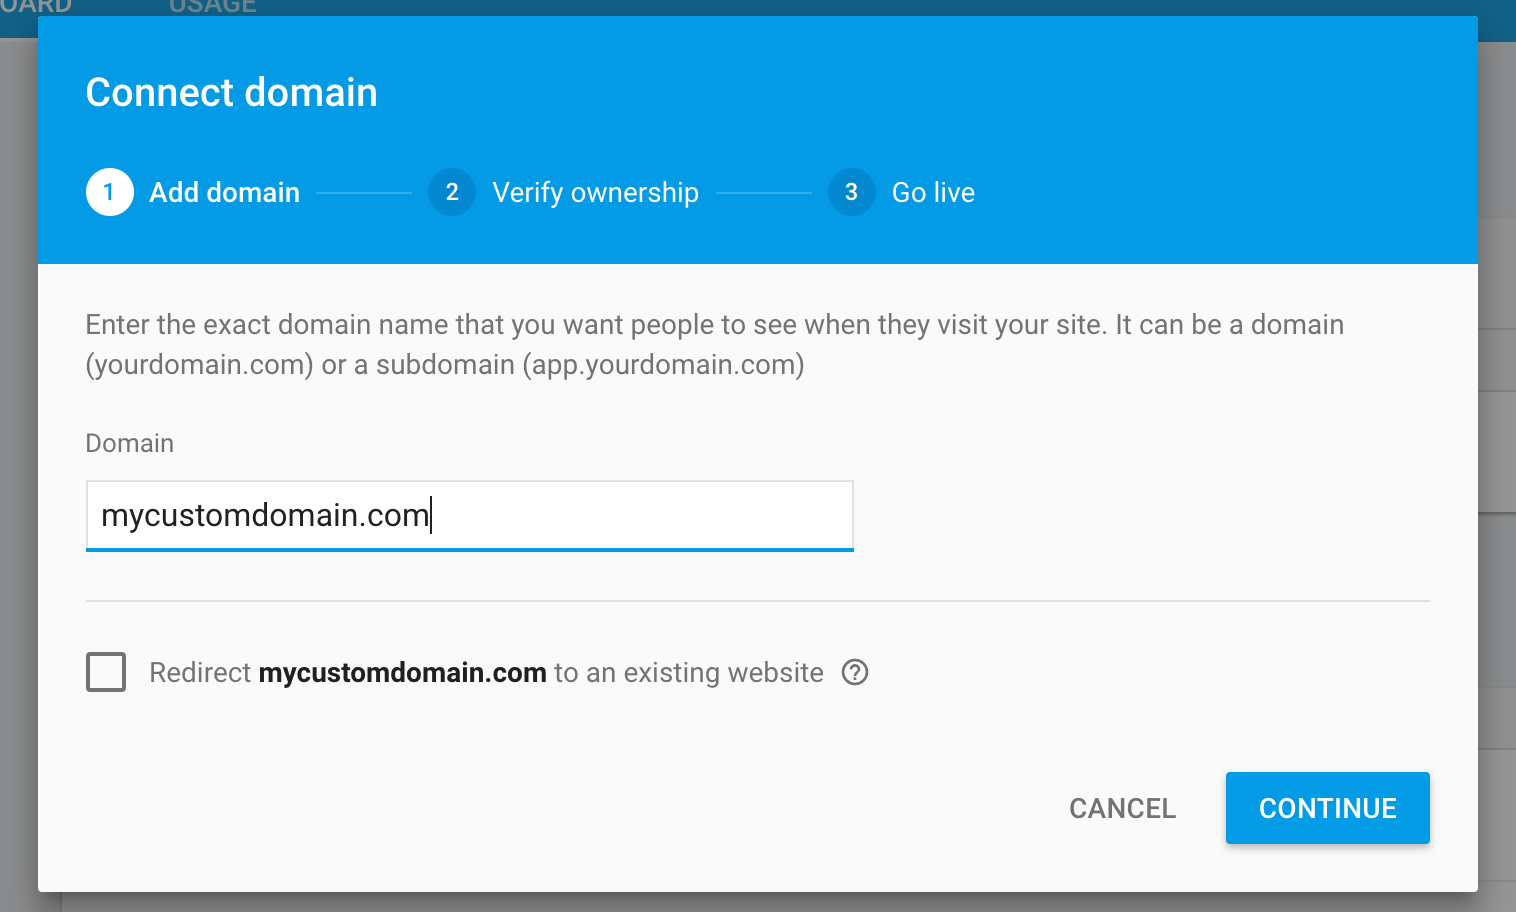
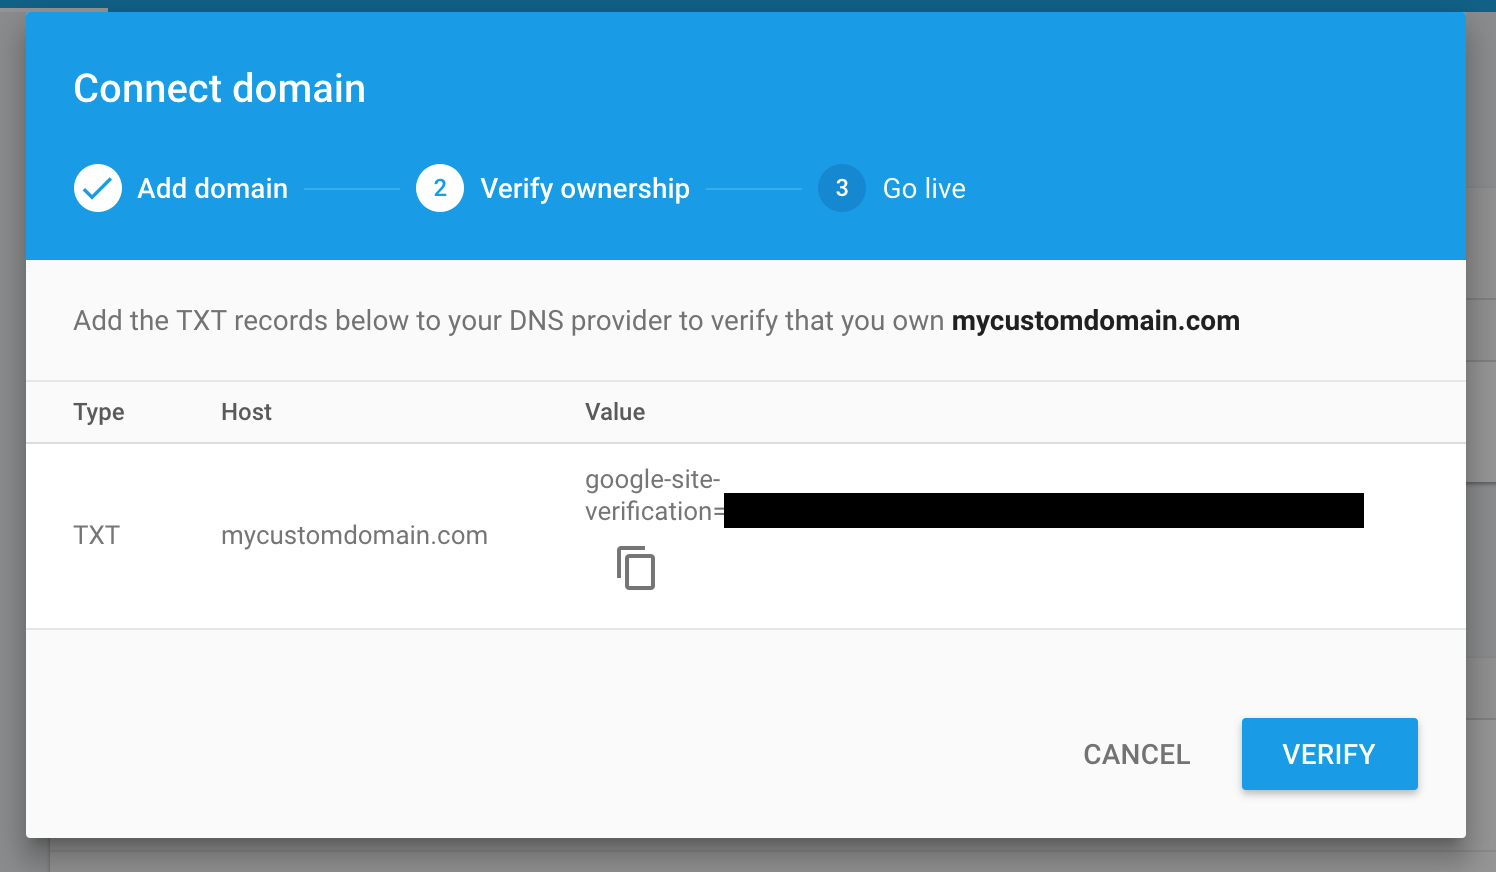
- Next you need to verify the domain ownership, for this you need to add a “TXT” record in your GoDaddy account.
GoDaddy Account
- Login to your GoDaddy account and go to “DNS manage” section.

-
Add a new “TXT” type record, enter Type as “TXT” host s “@” and TXT Value as “google-site-verification=xxxxxxxx” (you can get this from Verify ownership scree we have seen before)
-
Remove any existing “TXT” records if any

- Go back to firebase and click “Verify”, wait for few minutes and let firebase verify your ownership and then you can see your site up and running at mycustomdomain.com.
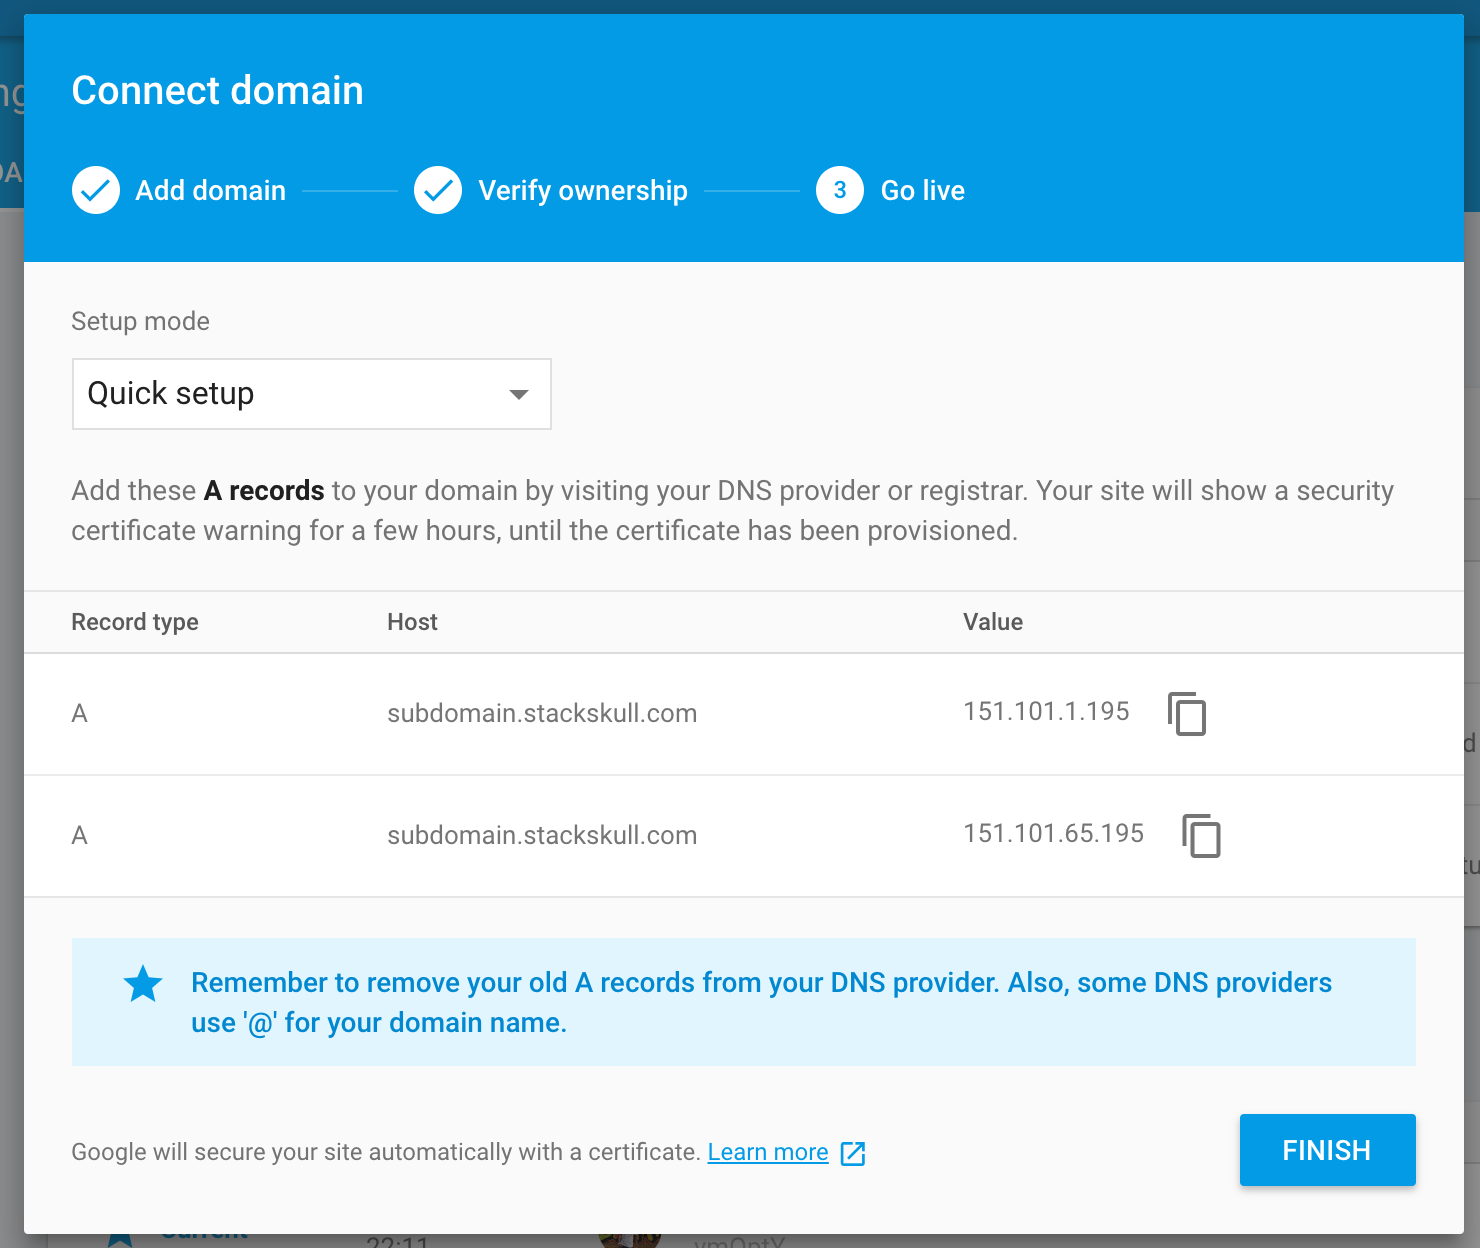
Custom Sub-domain firebase section
-
For Sub-domain there is almost same steps with minor changes in adding records.
-
Open Firebase hosting section for your Sub-domain project, click “CONNECT DOMAIN” and this time we will enter Sub-domain name e.g. sub-domain.mycustomdomain.com.

-
And as we already verified the ownership for mycustomdomain.com, firebase won’t ask us again :).
-
Click “CONTINUE”
-
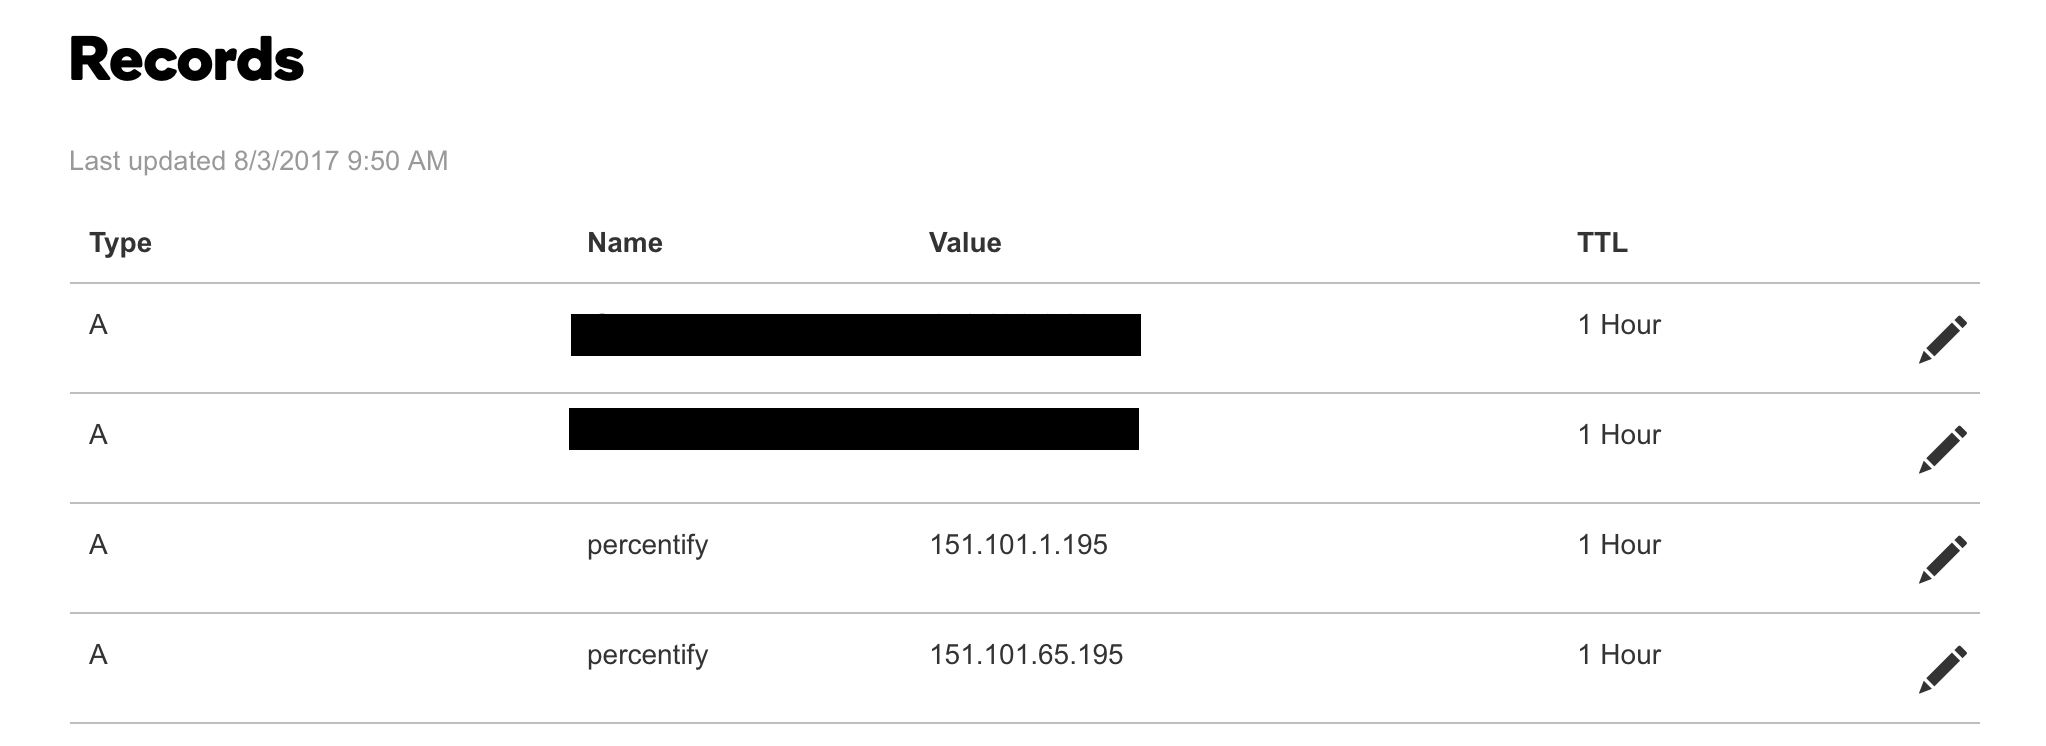
For Sub-domain we need to add “A” type record to our GoDaddy manage DNS section.
- And click “FINISH”, wait for few minutes and your Sub-domain will be up and running in NO time at sub-domain.mycustomdomain.com